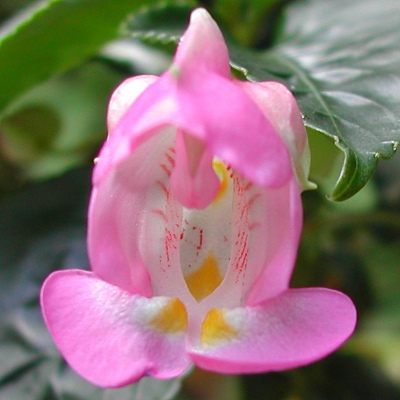
Germinating the seeds
When to plant -- Plant your seeds when you receive them for best germination. Getting started -- The seeds are small,
so work in a well-lit area. You may plant each seed in individual, small containers,
such as seedling starter trays For soil, use a well draining
mix. A typical mix is 2 parts
quality potting soil Fill the pots, without packing down the soil, and place a seed or 2 on top. If using a communal pot, plant them 1 inch (2.5 cm) apart. If you have vermiculite or
long-fibered sphagnum moss Until the seeds sprout, ensure that the surface soil always stays moist. A plastic dome may be used to maintain moisture, but leave it open slightly to allow some fresh air in. You may need to drip a few drops of water over the seeds every day to keep the seeds moist. They sprout well between 66 and 78 degrees F (19-26°C),
and a little cooler at night.
I have no experience germinating them outside that temperature range. I
recommend placing a
minimum/maximum thermometer Place the pots in a bright spot out of direct sun. A bright LED light kept 4 inches (10 cm) away provides the right amount of light (See: "Growing indoors with LED lights"). They should begin sprouting within 3 to 6 weeks, but sometimes take longer to start. Continue keeping the soil surface moist for 3 weeks after they sprout, and then remove them from any plastic dome. Try to avoid keeping water on the leaves while they're tiny. Fertilizing -- Once they're a week old,
give a small amount of dilute (1/8 strength) liquid fertilizer.
Hydroponic fertilizer
is ideal for small seedlings, because it is easily absorbed and contains all essential
nutrients. Repeat the feeding in 2 weeks, and again 2 weeks later. After
that, you may switch to a granular fertilizer Lighting -- Impatiens tuberosa grows well in bright shade or weak sun. Older plants might be able to handle stronger sunlight if they don't wilt, but they will need more frequent watering and feeding. Just avoid strong sunlight until the plants are a few months old. Transplanting -- When your plants are about 2 inches tall (5 cm), gently transfer them to pots about 3 inches tall (8 cm). Try not to disturb the roots when repotting. Watering -- Aim to keep the soil moist, but not fully saturated, most of the time. Avoid letting it dry out completely, which will cause the leaves to wilt. Climate -- Impatiens tuberosa grows in tropical lowland forests, where temperatures get in the upper 80s (31°C). It can often tolerate warmer conditions than that if nights are cool (below 65°F / 18°C). It's possible that consistently hot days with warm nights might stress it. The tuber can probably survive a light frost, but i recommend keeping the plant above 50 degrees F (10°C). Dormancy care - It's normal for the plant to drop it's branches and go dormant for 2-3 months per year. When this happens reduce watering until the soil is just slightly moist. Avoid letting it dry out completely, but don't keep it saturated. Pests to watch for -- Watch for other pests that might affect your other plants, like aphids, spider mites, thrips, or mealy bugs. Try using insecticidal soap spray before using stronger remedies, since some may harm the plant. If you have questions, feel free to contact me. Have fun growing them! - Jeff Strange Wonderful Things
|
|||||||||


